> ## Documentation Index
> Fetch the complete documentation index at: https://koreai-ai-for-service-dev.mintlify.site/llms.txt
> Use this file to discover all available pages before exploring further.
# Dialogflow Engine
[Back to External NLU Integrations](/ai-for-service/integrations/overview#external-nlu)
The Dialogflow ES adapter uses NLP and machine learning to identify user intent and extract entities. This page covers how to create and train a Dialogflow agent, enable the Dialogflow API, and generate service account credentials for use in the Kore.ai External NLU adapter settings.
Once configured, you can [test the conversation behavior](/ai-for-service/automation/testing/test-and-debug-overview) of your AI Agent using your Dialogflow ES model.
***
## Train the Dialogflow Engine
**Prerequisites:** At least one agent created on [Dialogflow Essentials](https://dialogflow.cloud.google.com/). Intent and entity names in Dialogflow must match those defined in the Platform.
To configure the Dialogflow ES adapter, you need the **Project ID** and **Private Key** from your Google Cloud service account JSON file. See [Enable the Dialogflow API](#enable-the-dialogflow-api) and [Create Service Account Credentials](#create-service-account-credentials).
### Create and Train an Agent
1. Go to [Dialogflow Essentials](https://dialogflow.cloud.google.com/) and click **Create Agent**. In this example, the agent is named `Test_Dialogflow`.
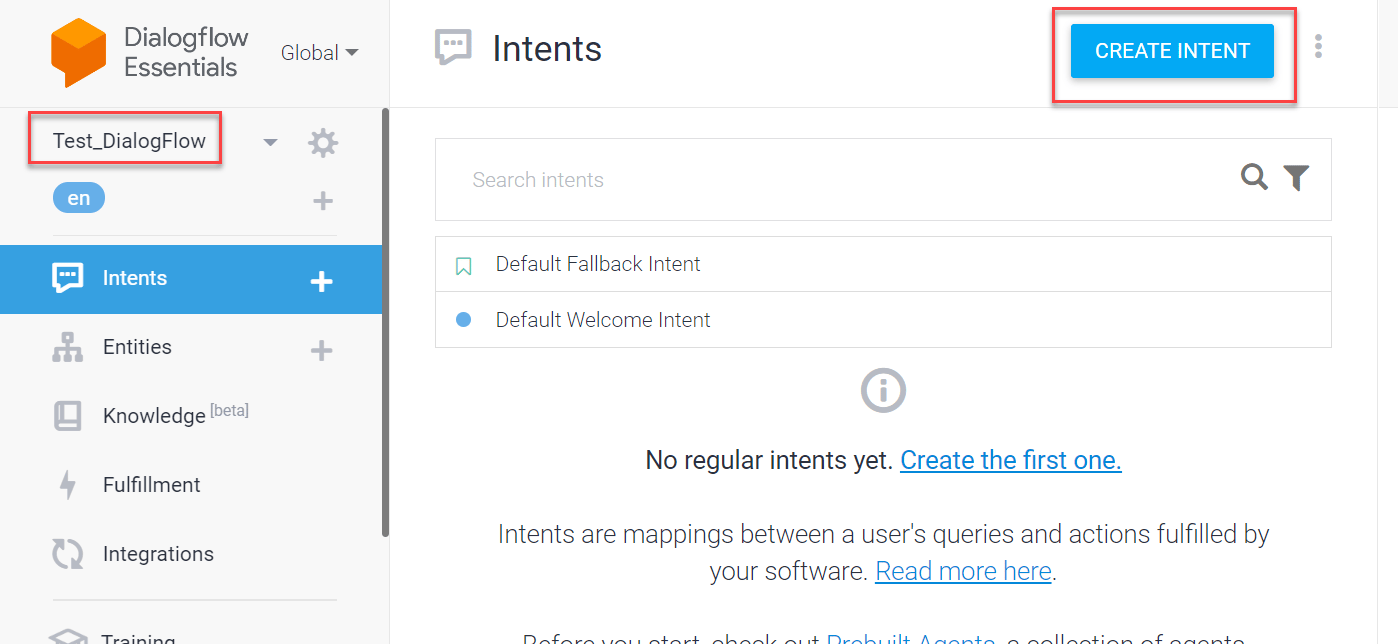 2. Click **Create Intent** and name it to match the intent in your AI Agent.
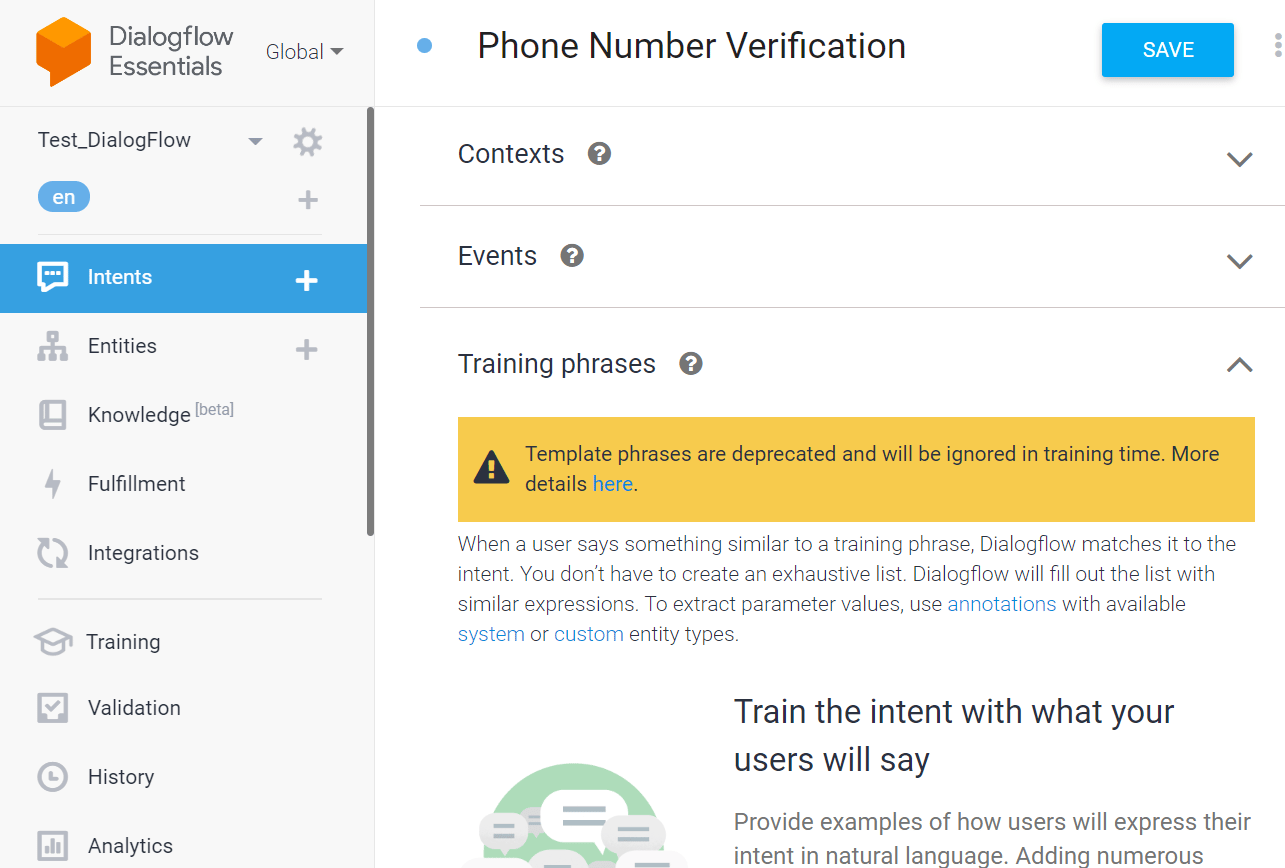 3. In this example, the intent is named `Phone Number Verification` to match the corresponding intent in the AI Agent.
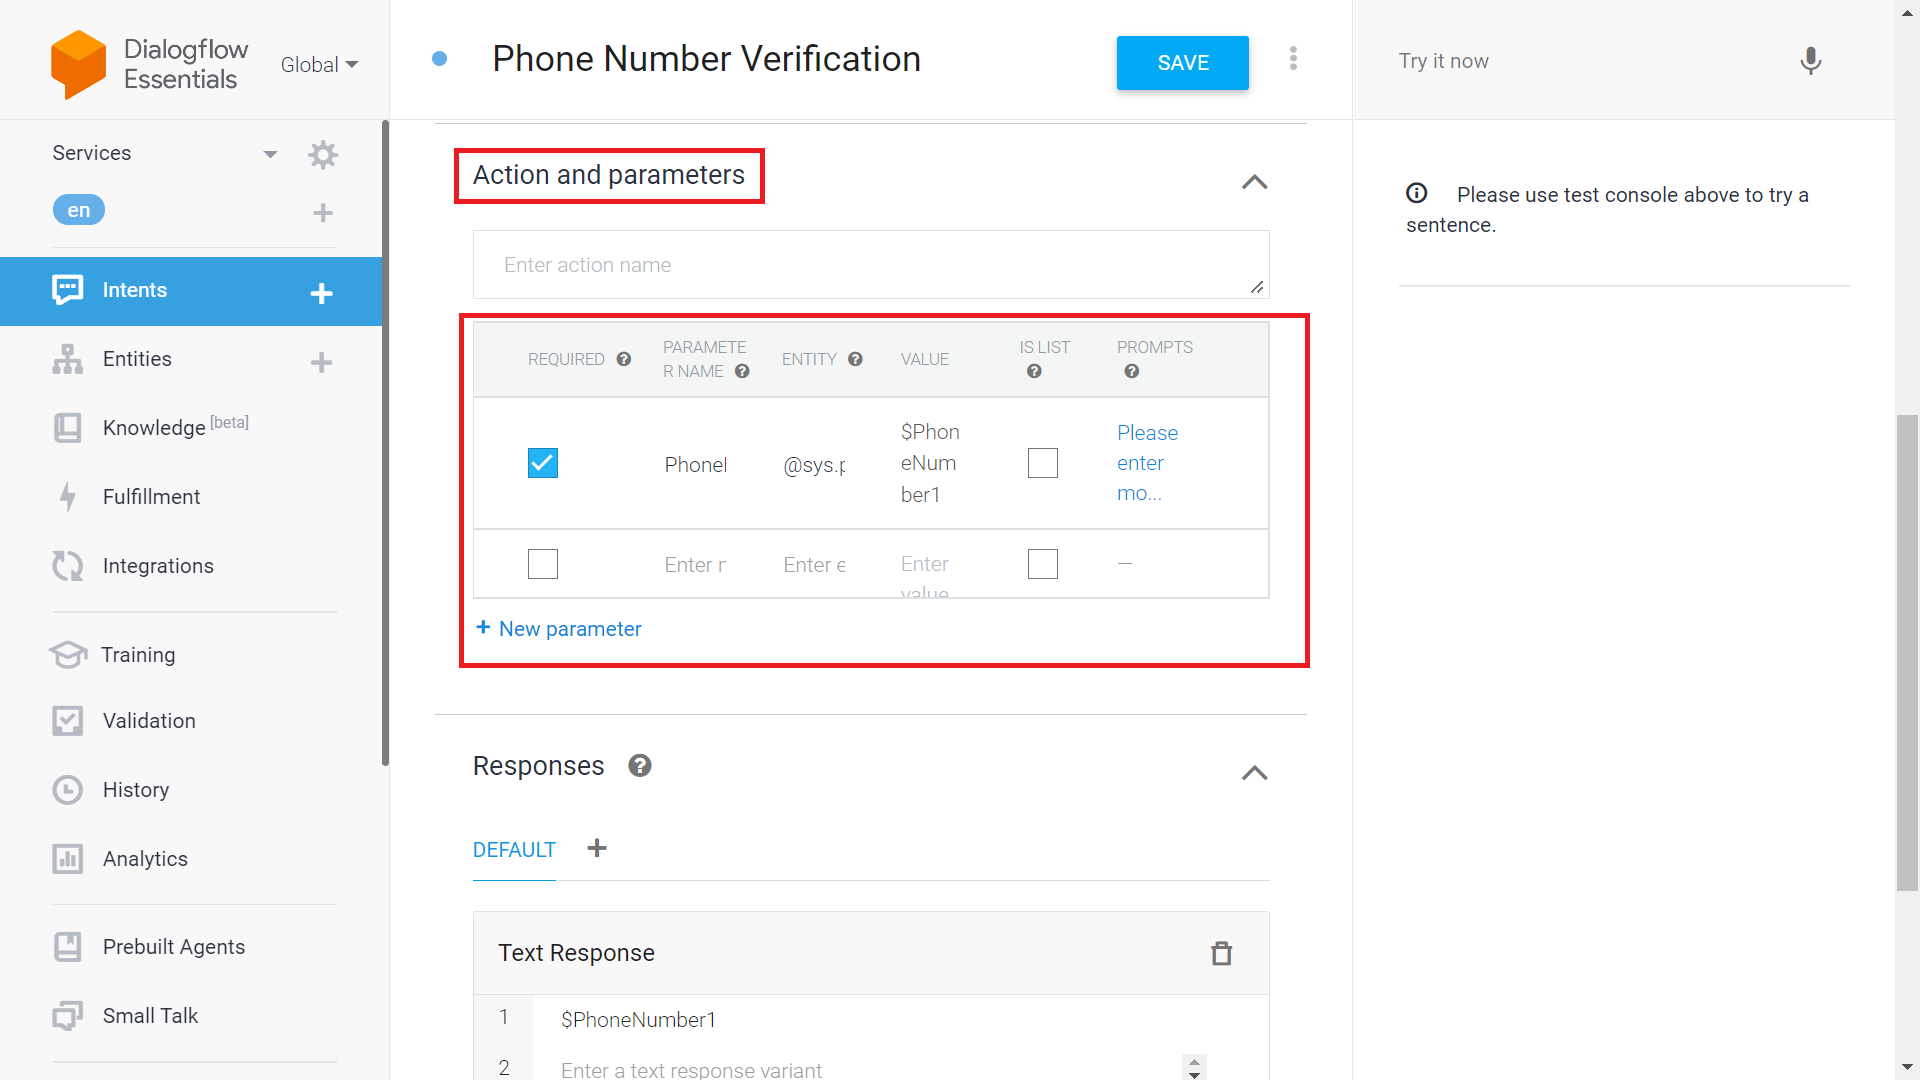
4. Under **Action and Parameters**, add the action name matching the entity, then fill in **Parameter Name**, **Entity**, **Value**, and **Prompt**.
3. In this example, the intent is named `Phone Number Verification` to match the corresponding intent in the AI Agent.
4. Under **Action and Parameters**, add the action name matching the entity, then fill in **Parameter Name**, **Entity**, **Value**, and **Prompt**.
 5. Under **Responses > Default**, add the **Text Response** to display to the user.
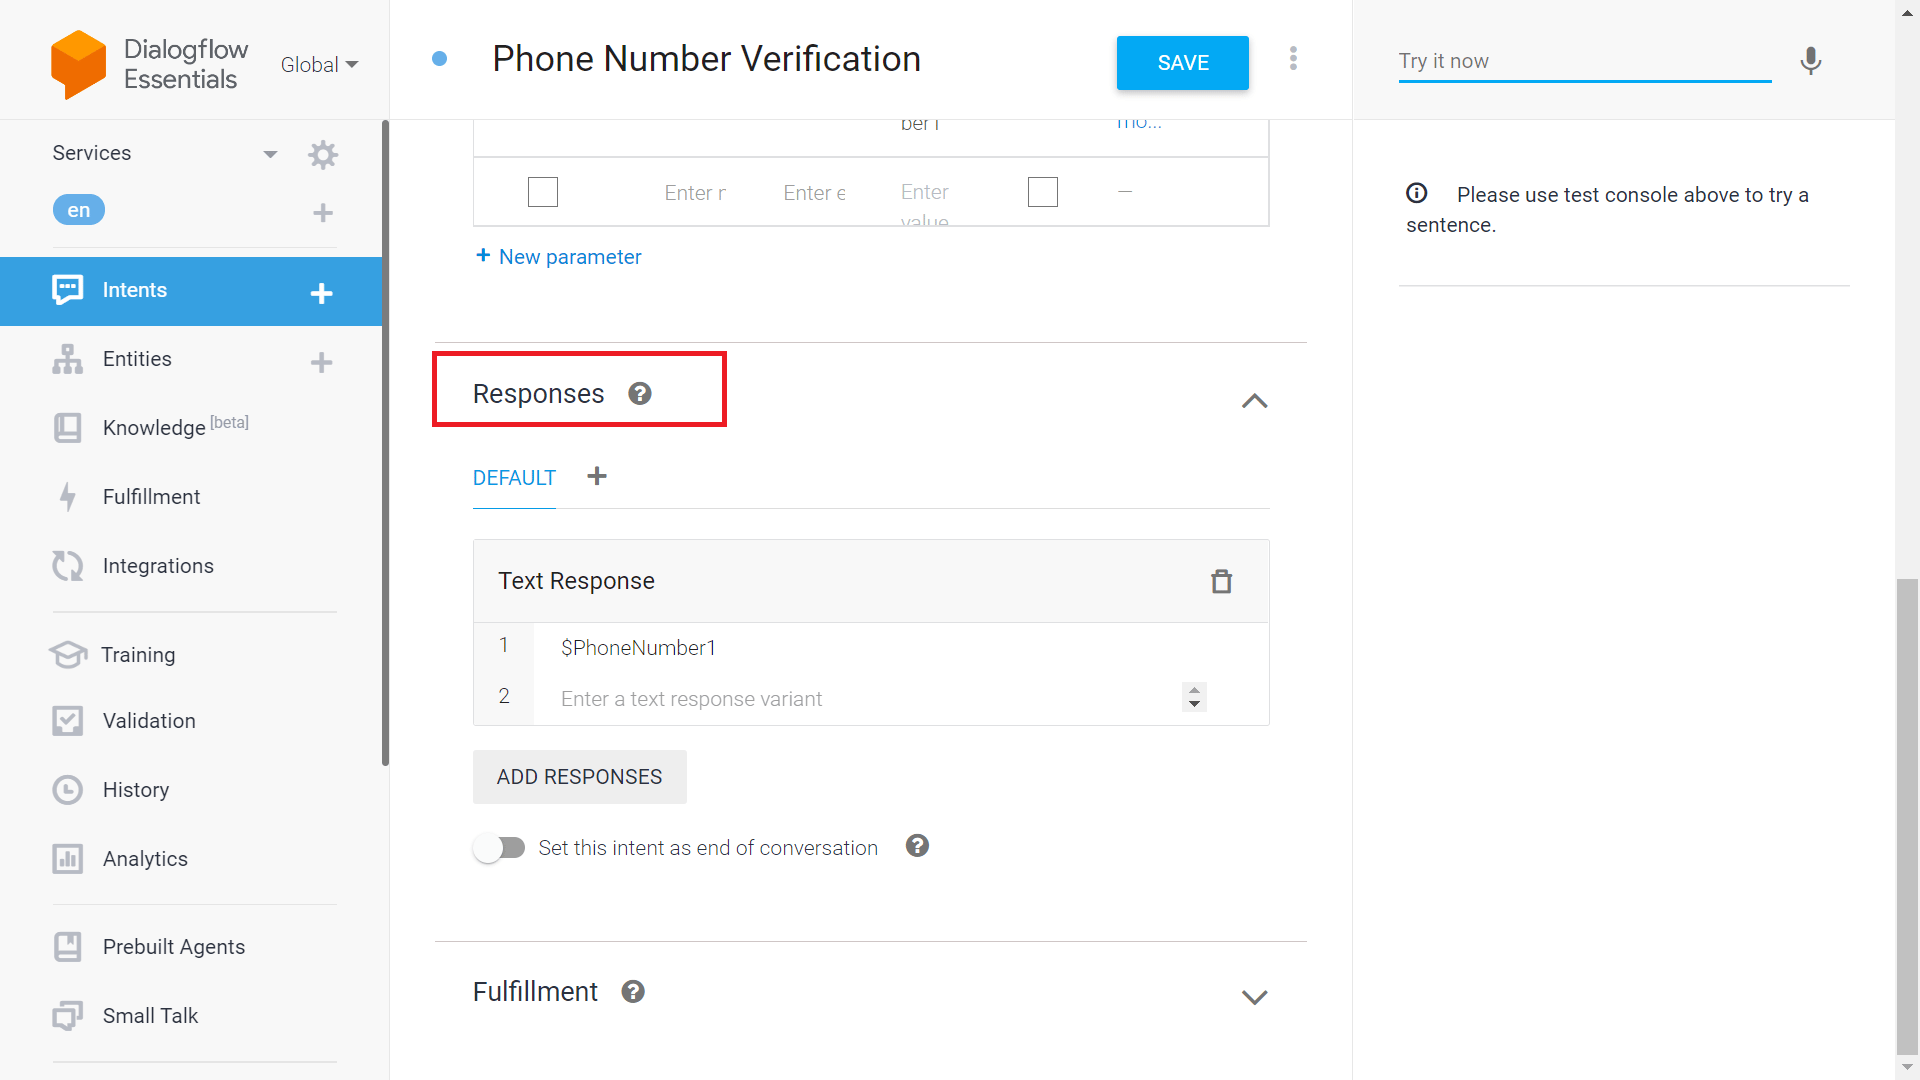 6. Click **Save**.
7. Go to **Training** in the left menu and enter the intent name under **User Says**.
6. Click **Save**.
7. Go to **Training** in the left menu and enter the intent name under **User Says**.
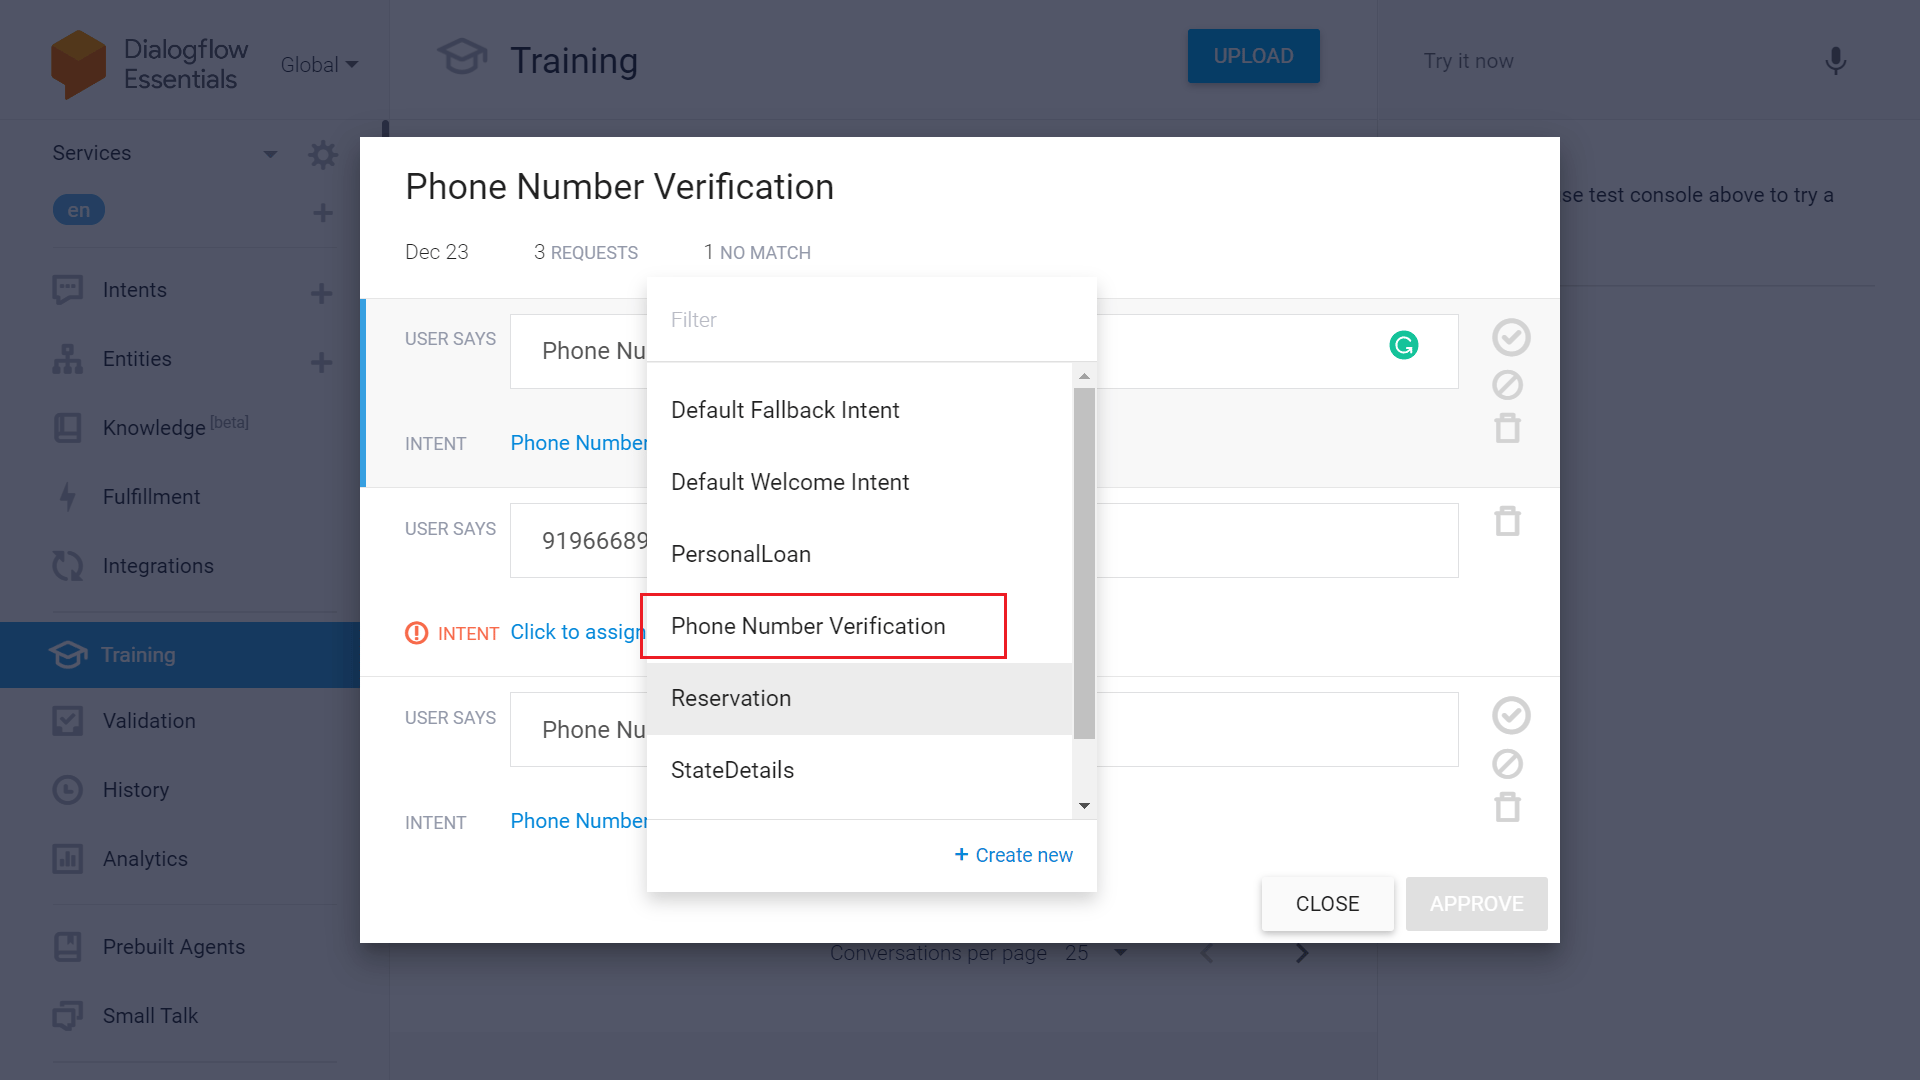 8. In the **Try Now** panel (top right), enter the intent name to test the configuration.
9. The configured text response appears under **Default Response**.
8. In the **Try Now** panel (top right), enter the intent name to test the configuration.
9. The configured text response appears under **Default Response**.
 You can configure any intents, entities, or FAQ details you need to identify using the Dialogflow ES adapter.
***
## Enable the Dialogflow API
1. Click the **Gear** icon next to the agent name in the Dialogflow dashboard.
You can configure any intents, entities, or FAQ details you need to identify using the Dialogflow ES adapter.
***
## Enable the Dialogflow API
1. Click the **Gear** icon next to the agent name in the Dialogflow dashboard.
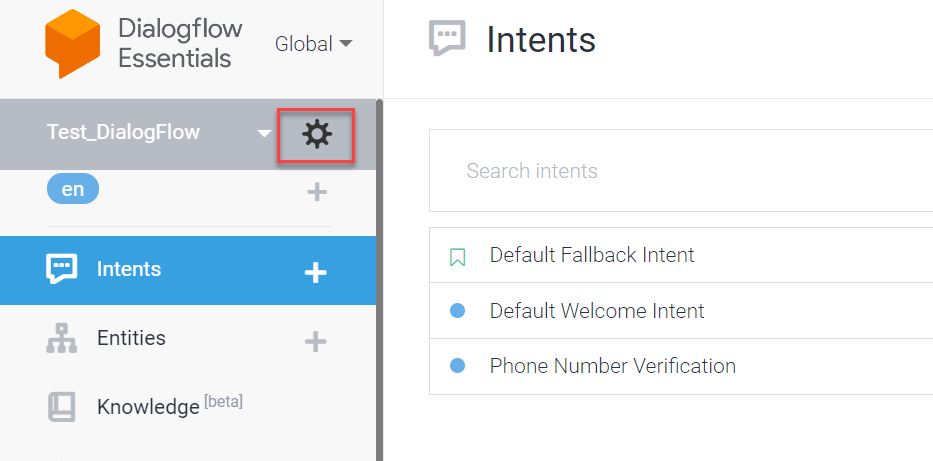 2. On the **General Settings** page, scroll down to find the **Project ID**.
 The Project ID is required when configuring the Dialogflow ES adapter on the Platform.
3. Click the Project ID to open Google Cloud.
4. In the Google Cloud dashboard, go to **APIs & Services > Enabled APIs & Services**.
5. Click **+ Enable APIs and Services** and search for **Dialogflow API**.
The Project ID is required when configuring the Dialogflow ES adapter on the Platform.
3. Click the Project ID to open Google Cloud.
4. In the Google Cloud dashboard, go to **APIs & Services > Enabled APIs & Services**.
5. Click **+ Enable APIs and Services** and search for **Dialogflow API**.
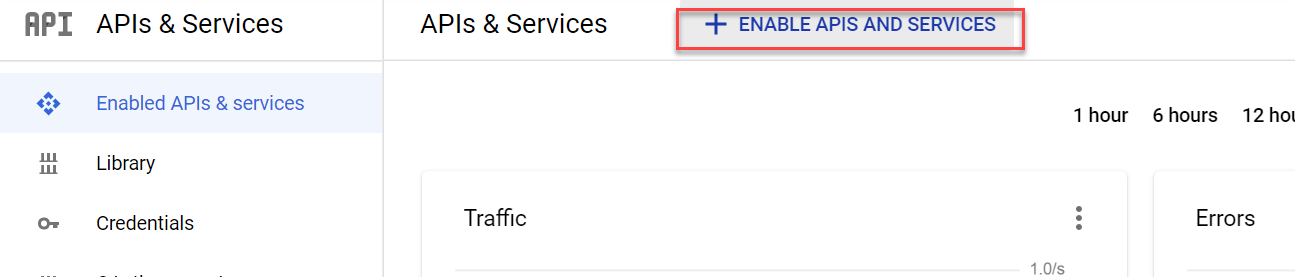
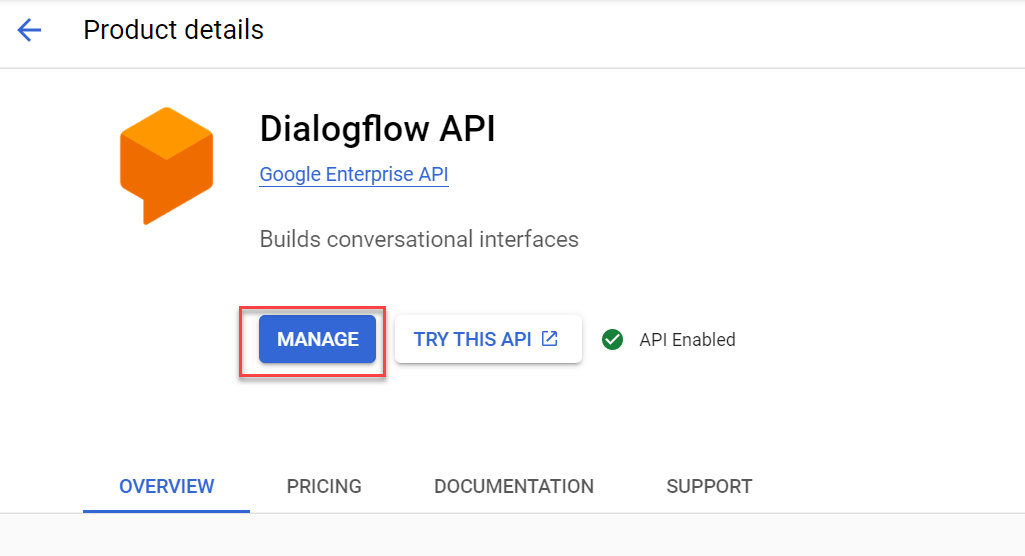
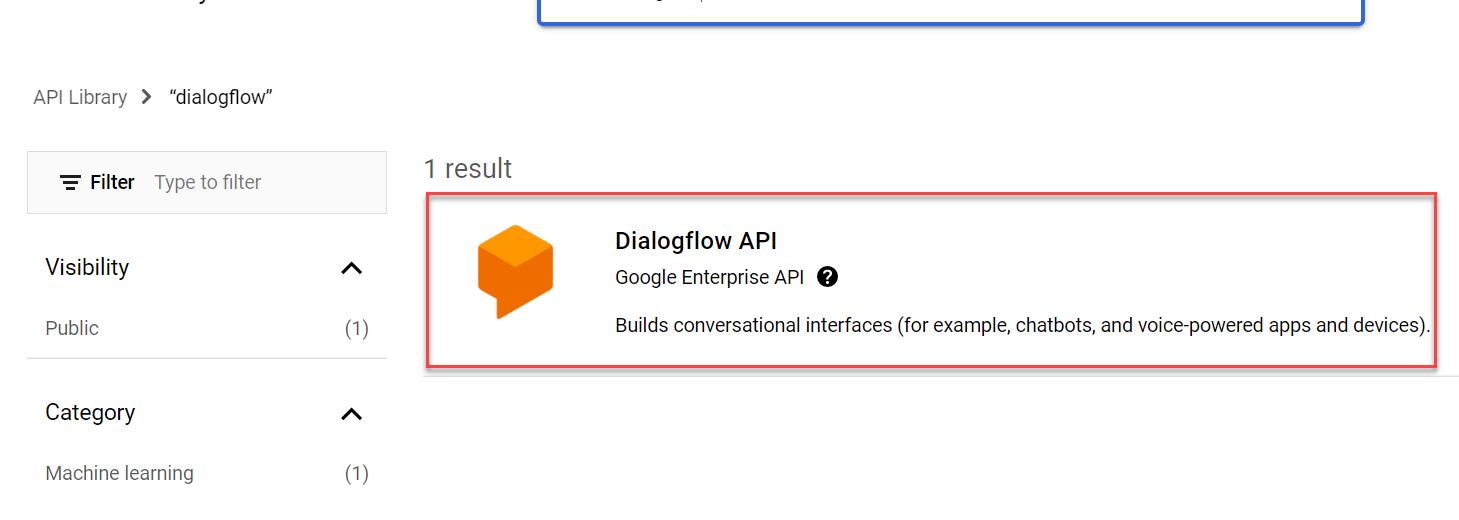 6. After activating the Dialogflow API, click **Manage** to open the API management dashboard.
 ***
## Create Service Account Credentials
### Create a Service Account
1. Click **Create Credentials** at the top of the Dialogflow API management dashboard.
If you already have service accounts, access them from **Credentials** in the left navigation menu.
***
## Create Service Account Credentials
### Create a Service Account
1. Click **Create Credentials** at the top of the Dialogflow API management dashboard.
If you already have service accounts, access them from **Credentials** in the left navigation menu.
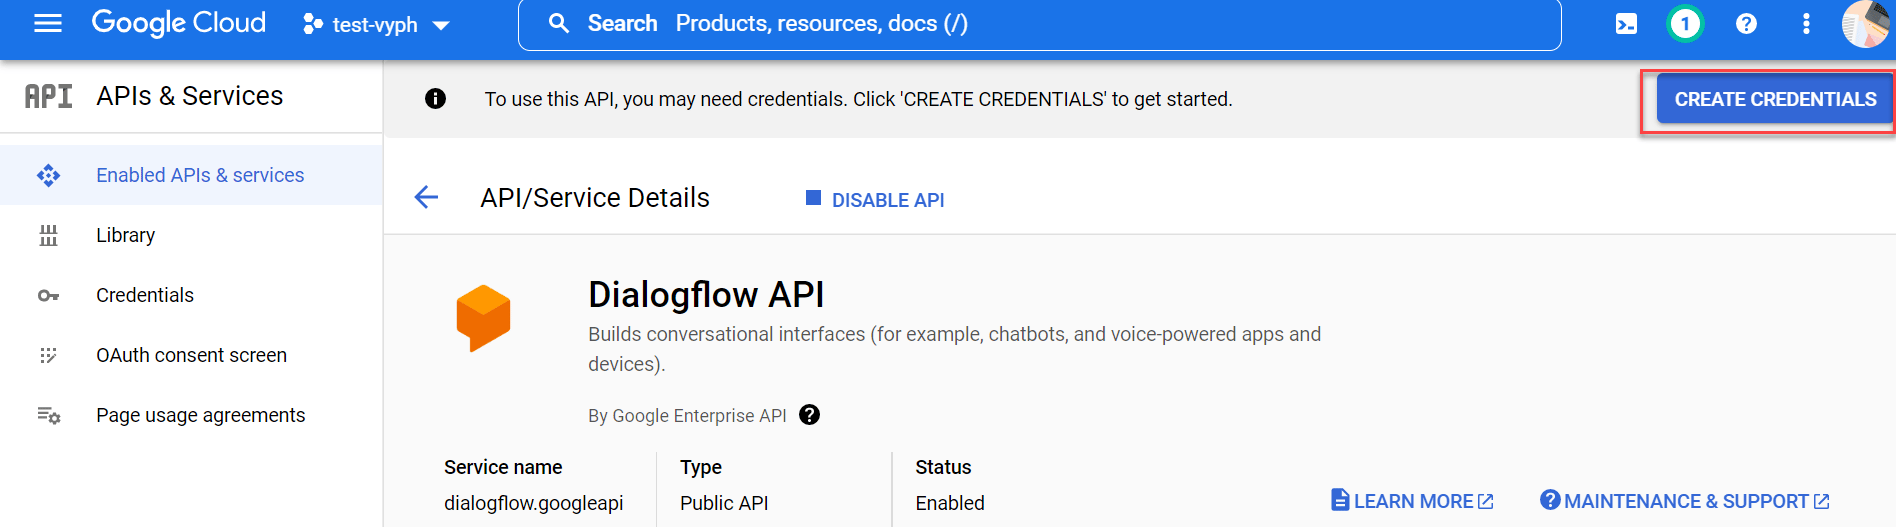 2. On the **Create Credentials** page, **Dialogflow API** is pre-selected in the **Select an API** dropdown.
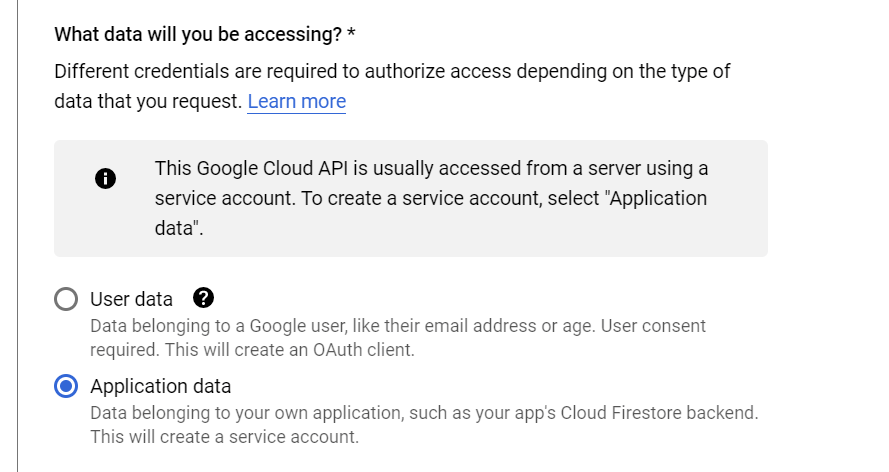
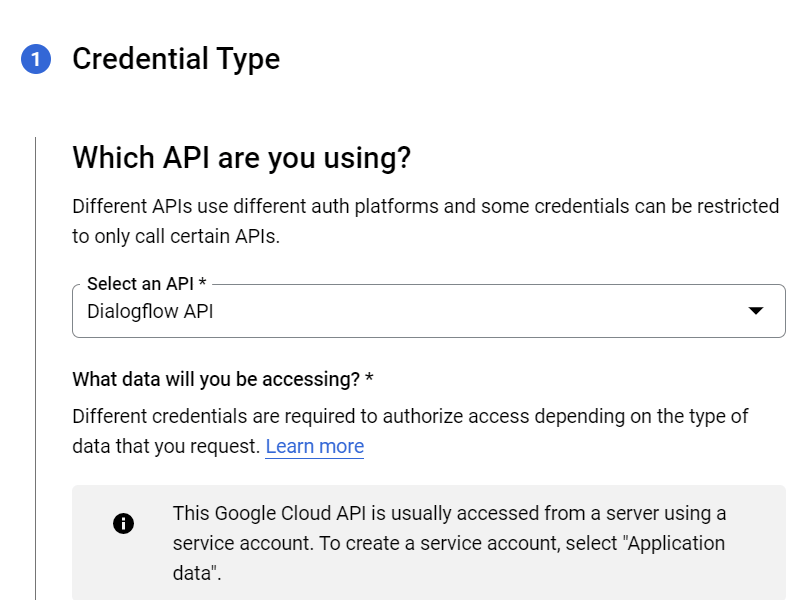 3. For **What data will you be accessing?**, select **Application Data**. Click **Next**.
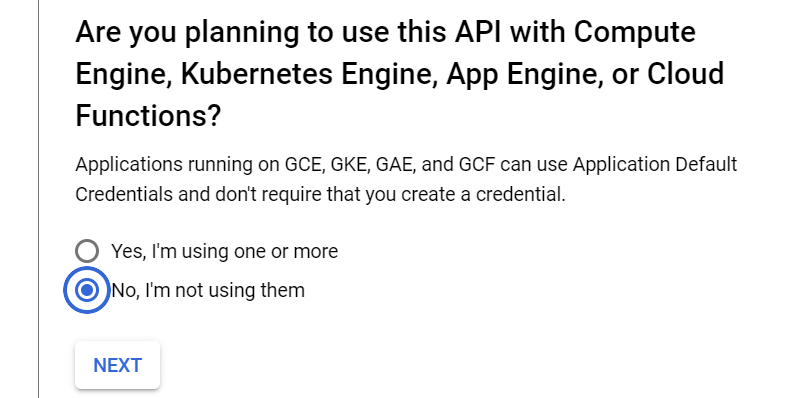
 4. Select **No, I'm not using them** and click **Next**.
 5. Fill in the service account name, ID, and description.
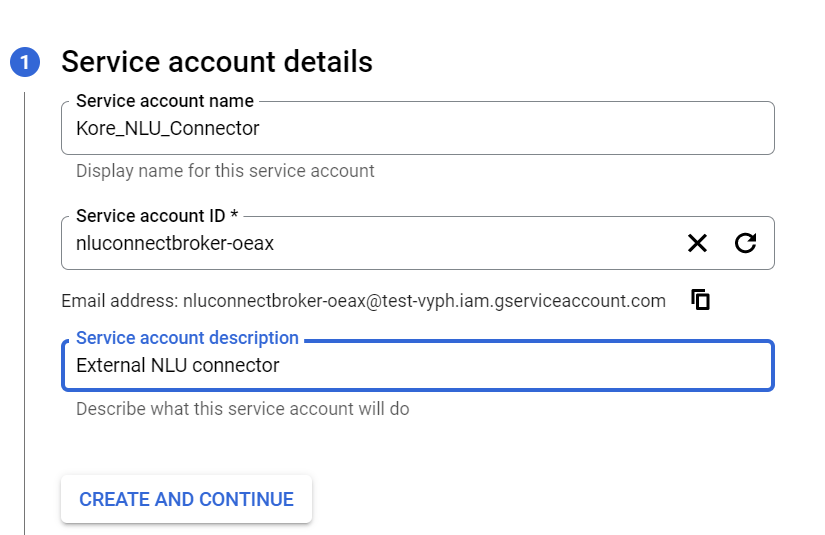 6. Click **Create and Continue**.
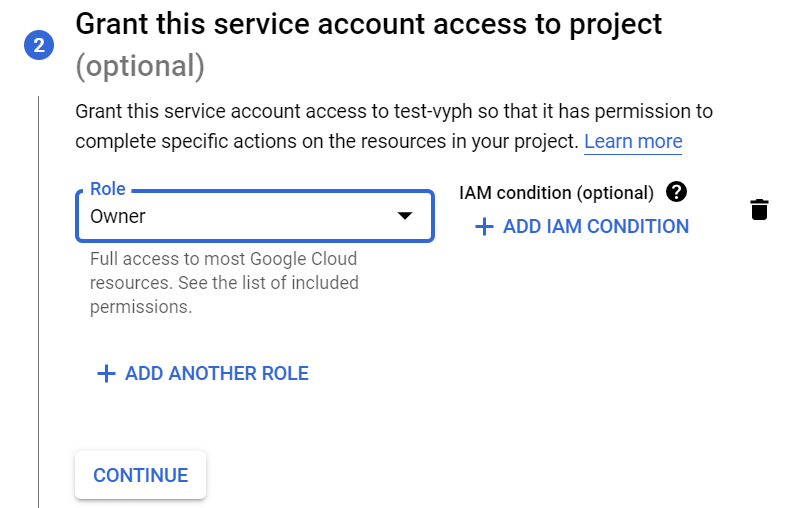
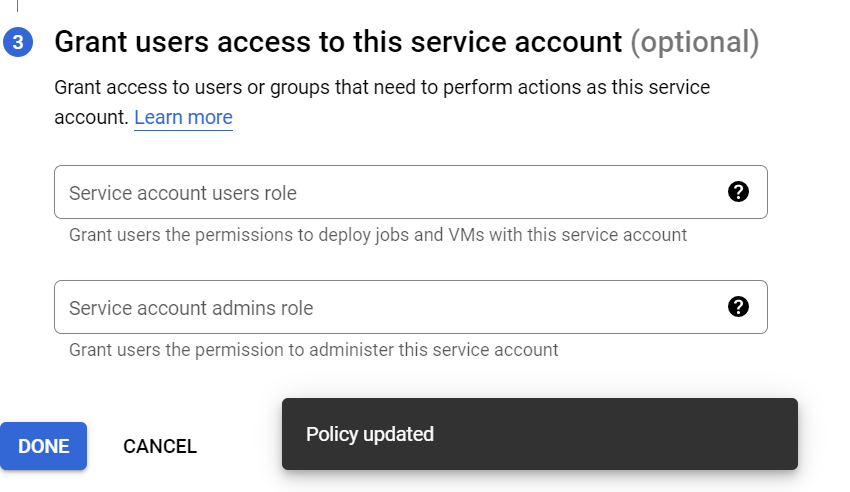
7. Grant the required access permissions and user access on the subsequent pages.
6. Click **Create and Continue**.
7. Grant the required access permissions and user access on the subsequent pages.
 ### Generate a Private Key
1. Click the service account under **Service Accounts** in **APIs & Services**.
### Generate a Private Key
1. Click the service account under **Service Accounts** in **APIs & Services**.
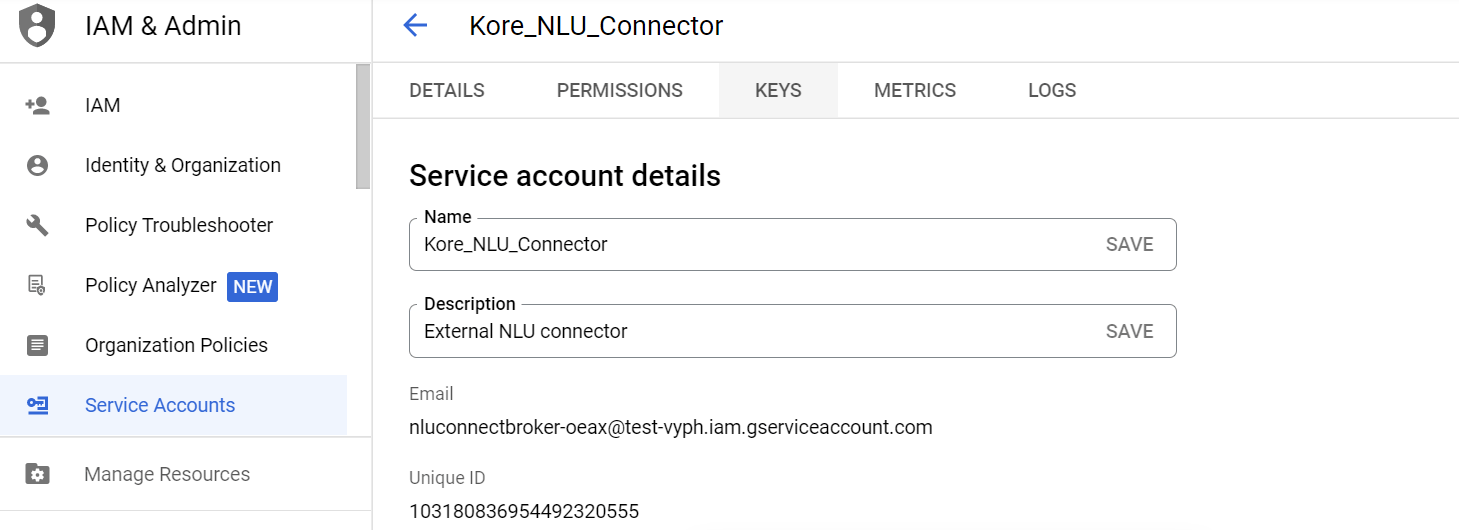
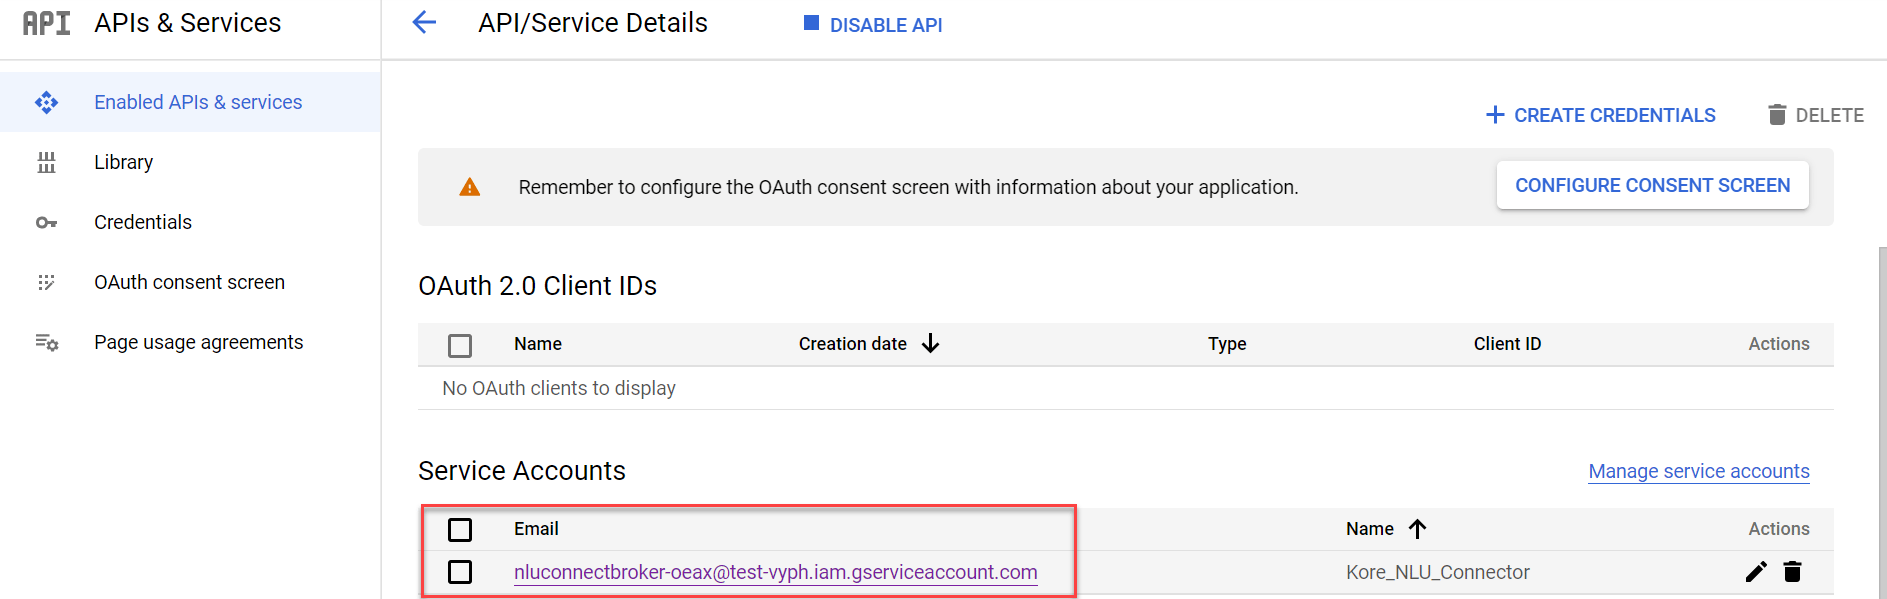 2. Go to the **Keys** tab.
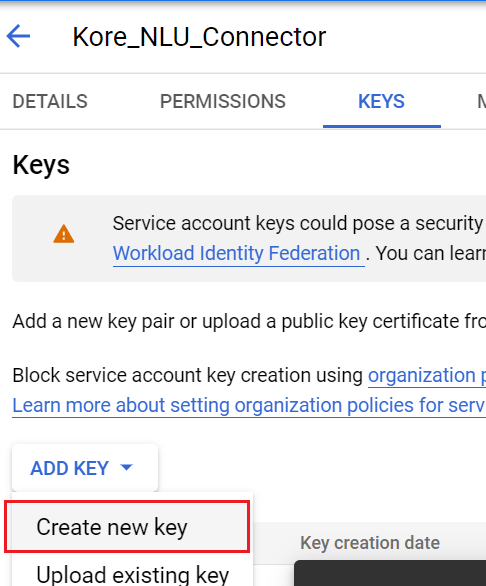
 3. In the **Add Key** dropdown, select **Create a new key**.
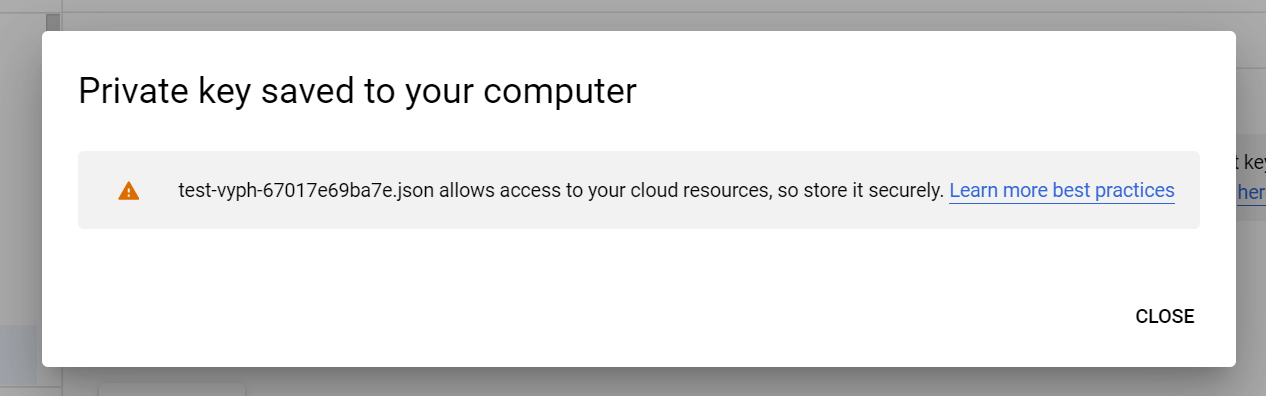
 4. Select **JSON** and confirm.
 JSON is selected by default.
A JSON file is downloaded to your computer.
JSON is selected by default.
A JSON file is downloaded to your computer.
 The file structure:
```json theme={null}
{
"type": "***",
"project_id": "***",
"private_key_id": "***",
"private_key": "***",
"client_email": "***",
"client_id": "***",
"auth_uri": "***",
"token_uri": "***",
"auth_provider_x509_cert_url": "***",
"client_x509_cert_url": "***"
}
```
Save this JSON file securely — you can't access it again. Copy the entire contents into the **Private Key** field in the Kore.ai External NLU adapter settings.
***
To validate the Dialogflow NLU configuration, see [Test and Debug](/ai-for-service/automation/testing/test-and-debug-overview).
The file structure:
```json theme={null}
{
"type": "***",
"project_id": "***",
"private_key_id": "***",
"private_key": "***",
"client_email": "***",
"client_id": "***",
"auth_uri": "***",
"token_uri": "***",
"auth_provider_x509_cert_url": "***",
"client_x509_cert_url": "***"
}
```
Save this JSON file securely — you can't access it again. Copy the entire contents into the **Private Key** field in the Kore.ai External NLU adapter settings.
***
To validate the Dialogflow NLU configuration, see [Test and Debug](/ai-for-service/automation/testing/test-and-debug-overview).